On this page, you’ll find free sample questions from all test categories of the digital TestAS core module. These examples give you a realistic impression of the test structure and the types of challenges you can expect.
Looking for all the key info about the TestAS in one place?
On our info page, you'll find everything you need to know about the TestAS and our complete training for the digital and paper-based core module.
Figure Sequences in the TestAS with Examples and Solutions
The tasks increase in difficulty, starting with simple movement patterns and progressing to complex combinations involving multiple figures and rules.
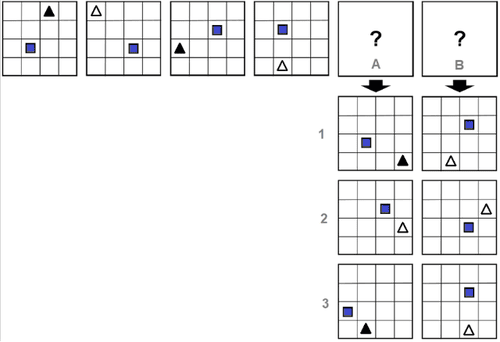
Sample Task with Solution and Explanation, Level 1: Easy
Continue the sequence of figures correctly.

Which of the three options should be selected for A and B?
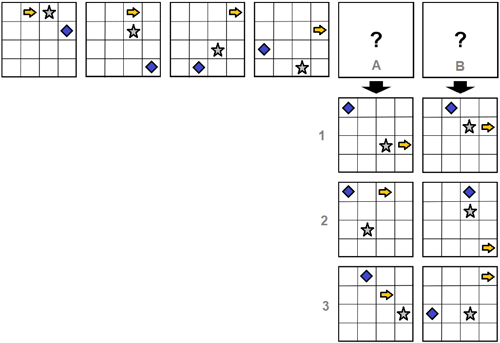
Sample Task with Solution and Explanation, Level 2: Medium
Continue the sequence of figures correctly.
Which of the three options should be selected for A and B?
Sample Task with Solution and Explanation, Level 3: Hard
Continue the sequence of figures correctly.
Which of the three options should be selected for A and B?
Sample Task with Solution and Explanation, Level 4: Very Hard
Continue the sequence of figures correctly.
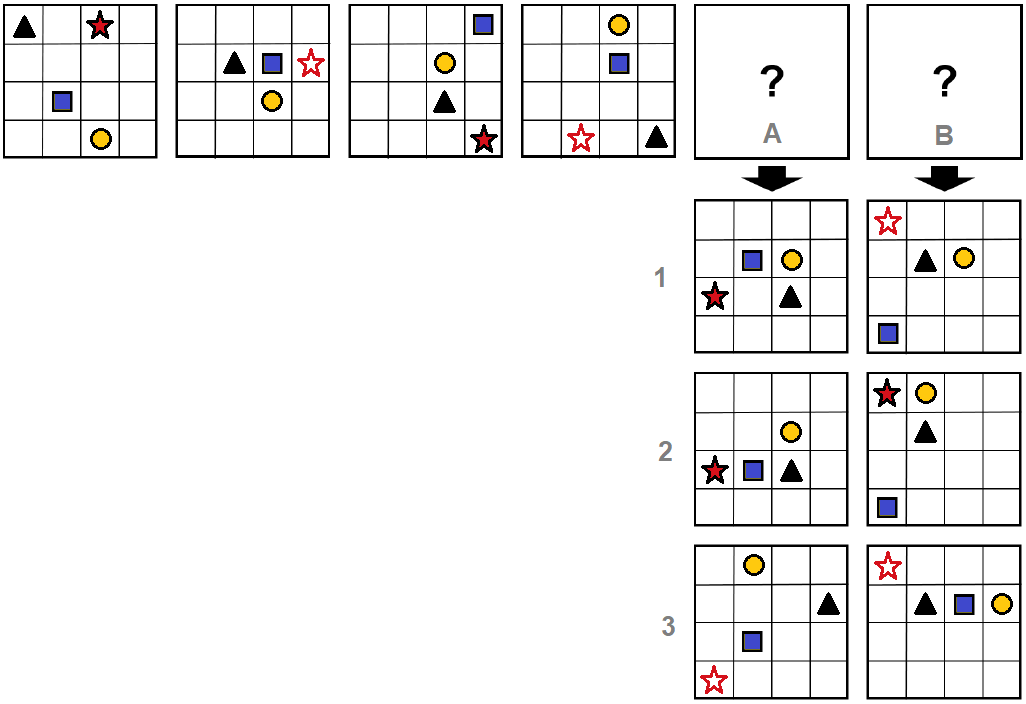
Which of the three options should be selected for A and B?
Want to prepare thoroughly?
Our realistic core module training for the digital TestAS will be available in English in a few days.
Mathematical Equations in the TestAS with Examples and Solutions
The tasks are arranged by difficulty, starting with simple equations with two unknowns and progressing to more complex systems with four unknowns.
Latin Squares in the TestAS with Sample Questions and Solutions
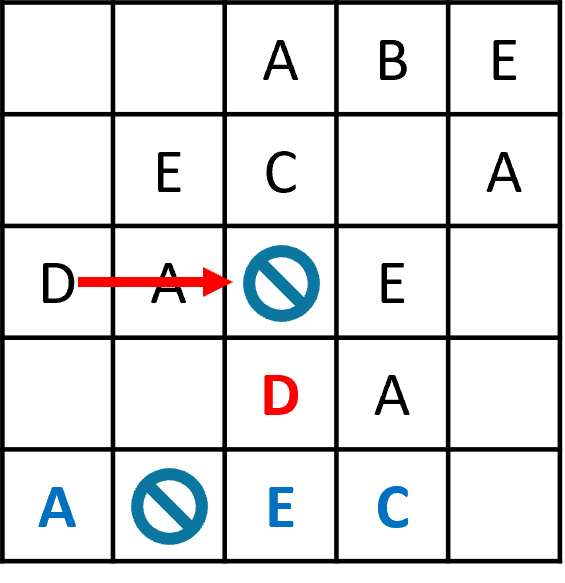
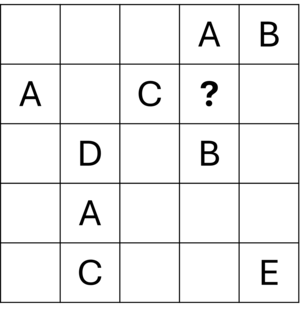
Sample question 1 on Latin Squares in the TestAS with solution and explanation
Five letters are to be arranged in a 5×5 grid so that each letter appears only once in each row and each column.
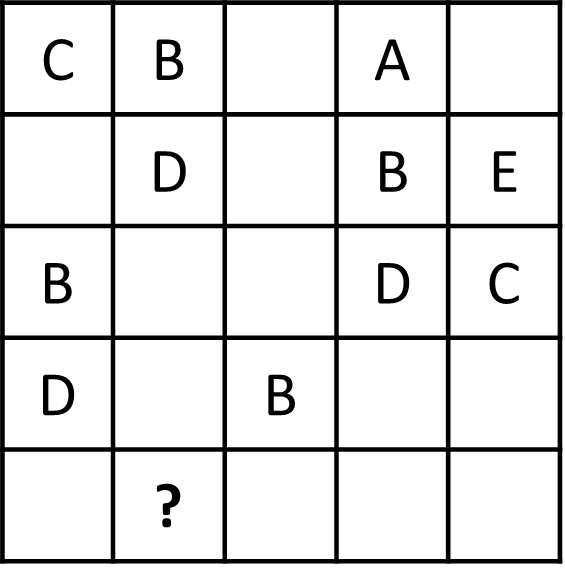
Which letter should replace the question mark?
The correct answer is A.
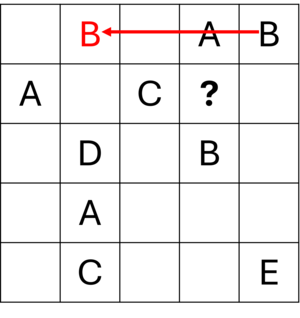
Because there are already Bs in the top row and in the fourth row, the B in the last column must be added mentally in the bottom row.
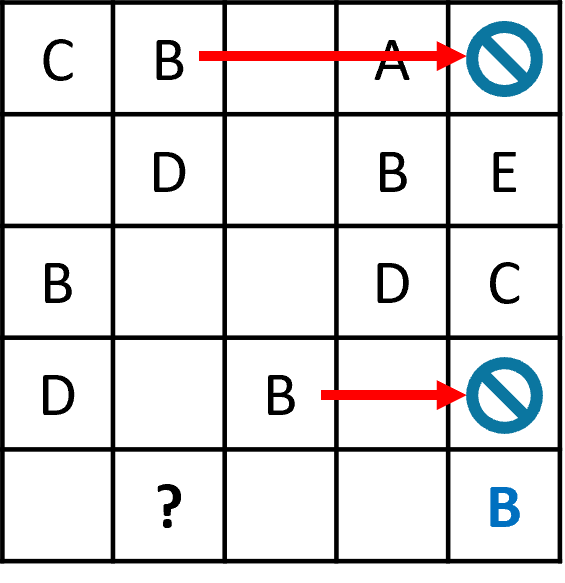
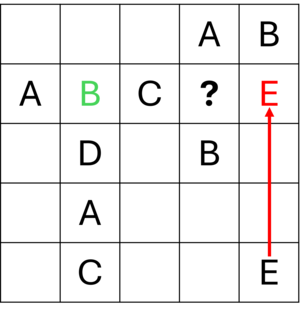
Because there is already an E in the last column of the second row, the E in the first column must be added mentally in the bottom row.
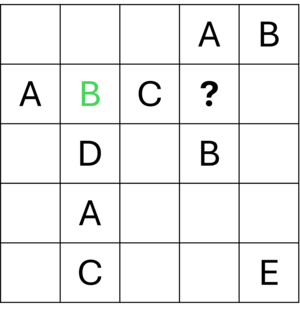
There are already Ds in the second and fourth columns. Therefore, the D in the bottom row can only be added mentally in the centre column.
There is already an A in the fourth column, so it can only be the letter you are looking for in the bottom row.
Therefore, the correct answer is A.
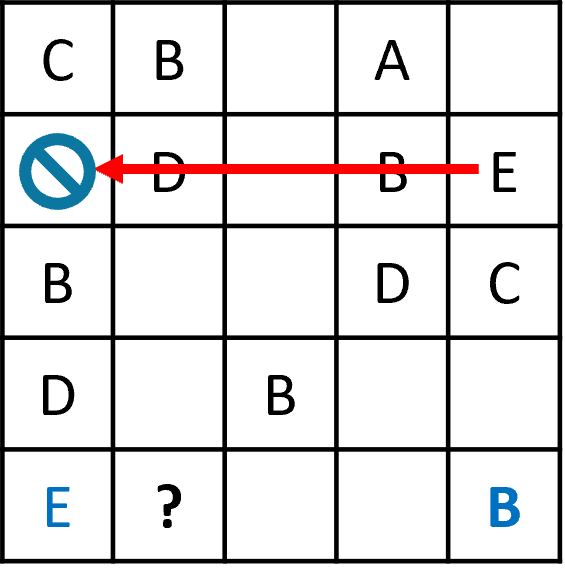
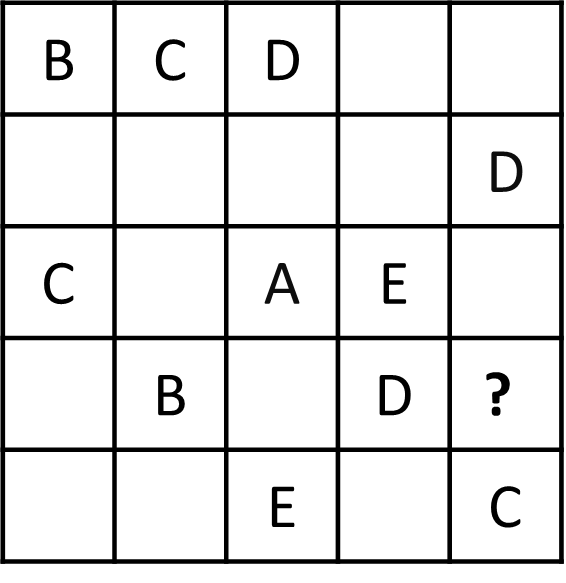
Sample question 2 on Latin Squares in the TestAS with solution and explanation
Five letters are to be arranged in a 5×5 grid so that each letter appears only once in each row and each column.
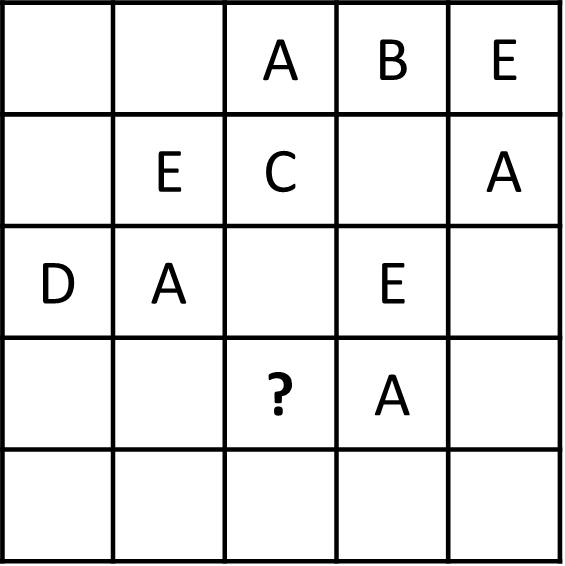
Which letter should replace the question mark?
The correct answer is: D.
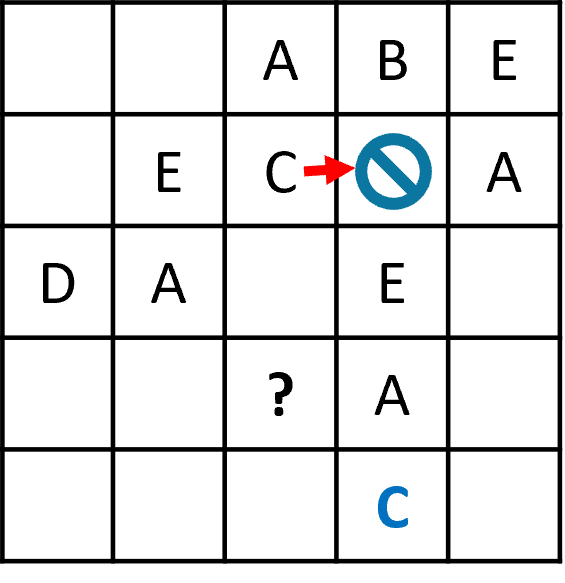
Because there is already an A in the second row, the C in the fourth column must be added mentally in the bottom row.
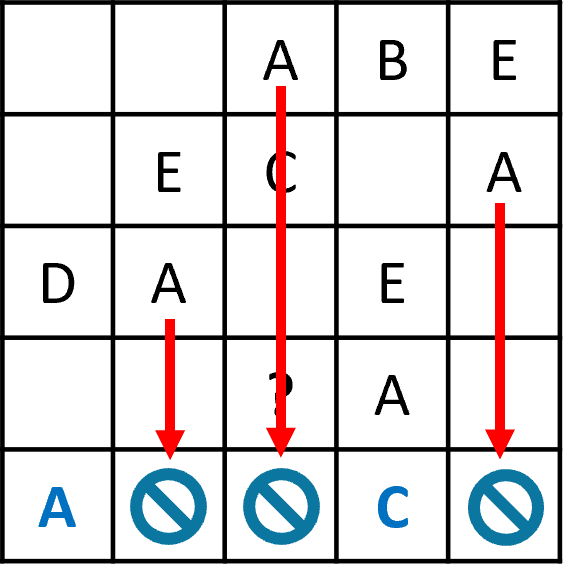
There is already A in the second, middle and last column. Therefore, the A in the bottom row can only be added in the first column.
There are already Es in the second and last column. Therefore, the E in the bottom row can only be added in the centre column.
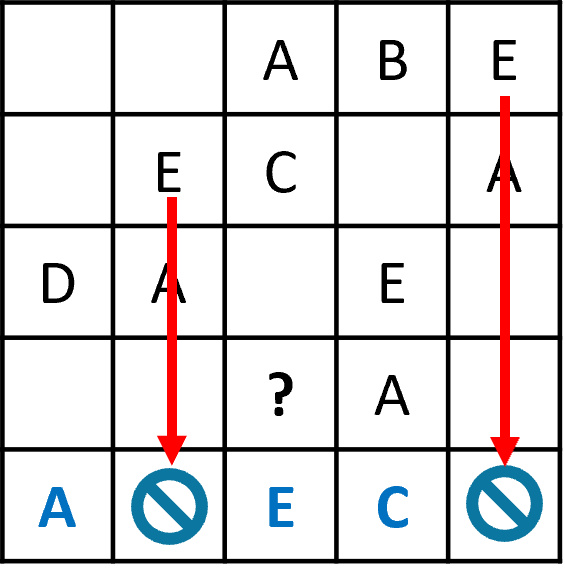
There is already a D in the middle row. Therefore, the D in the centre column can only be the letter you are looking for.
Therefore, the correct answer is D.
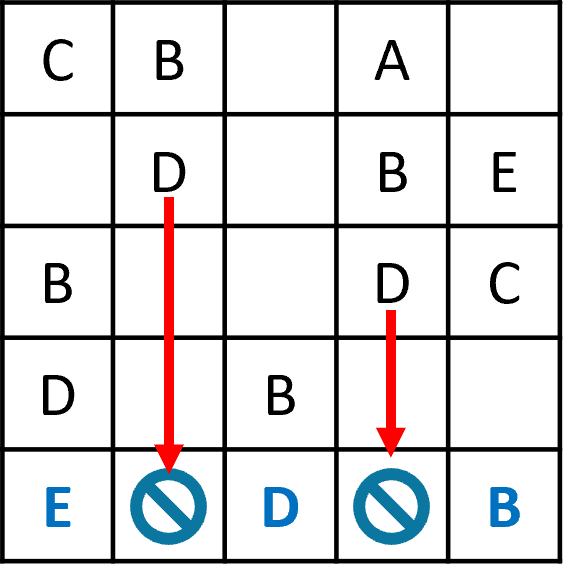
Sample question 3 on Latin Squares in the TestAS with solution and explanation
Five letters are to be arranged in a 5×5 grid so that each letter appears only once in each row and each column.
Which letter should replace the question mark?
The correct answer is: A.
Because there is already an E in the middle row of the fourth column, the E in the top row must be added mentally in the last column.
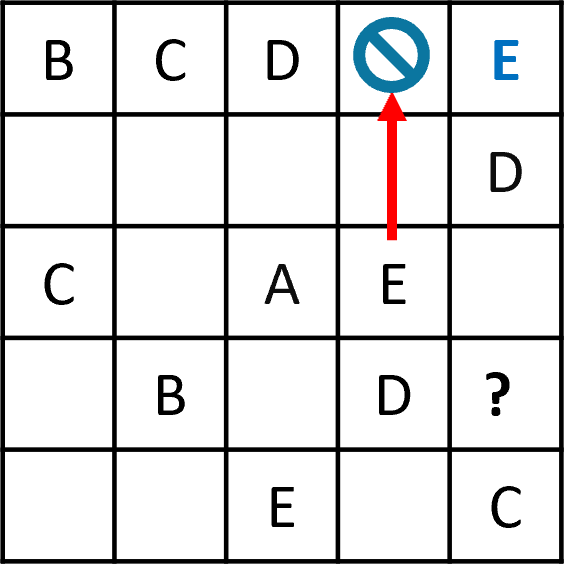
There is already an A in the centre column of the middle row. Therefore, the A can only be the object you are looking for in the fourth row in the last column.
Therefore, the correct answer is A.
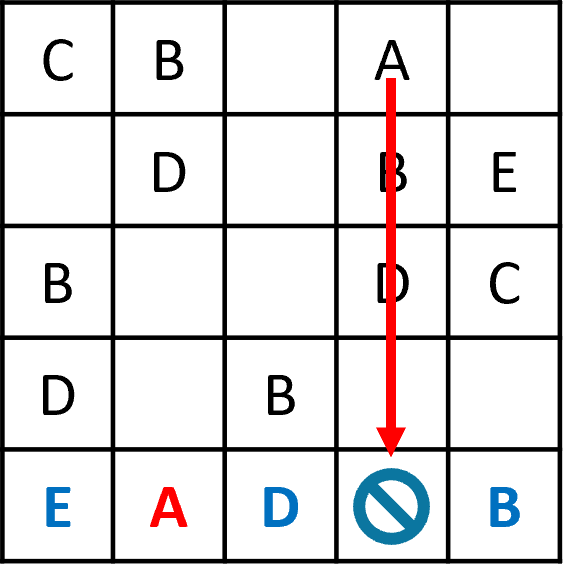
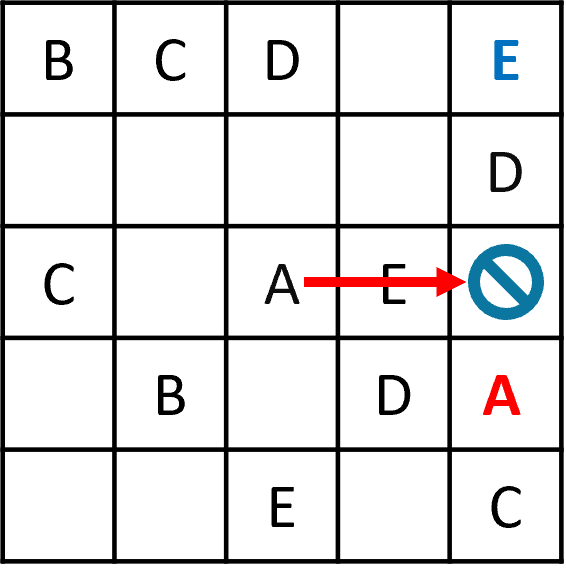
Sample question 4 on Latin Squares in the TestAS with solution and explanation
Five letters are to be arranged in a 5×5 grid so that each letter appears only once in each row and each column.
Which letter should replace the question mark?
The letters B, D and E are missing in the second row.
B and D are missing in the second column.
As there is already a B in the first row, the B in the second row belongs in the second column.
Now only the letters D and E are missing in the second row.
As there is already an E in the last column, the E in the second row must be placed in the penultimate column.
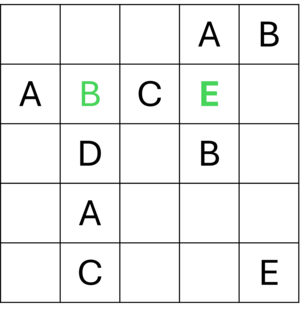
So the correct answer is: E.
These tasks show you how the digital TestAS is structured.
All tasks are based on the format, difficulty, and types of the official test and offer you realistic preparation.


